Quickstart Guide 🚀
TLDR Highlevel steps:
- Create your Cloud Slicer account
- In the Dashboard:
- Generate an API token
- Create a filament config profile
- Create your printer config profile
- In the API Playground:
- Authenticate with the API in our API Playground
- Make your first API call to
/v1/fileto upload a file - Queue a quote with
POST /v1/quote/queue/{file_id}using yourprinter_idandfilament_id - Poll
GET /v1/quote/{quote_id}untilstatusissuccess, then read the pricing info from the response
-
Create Your Account
- Visit www.cloudslicer3d.com to sign up for a new account
- Fill out the registration form with your details
- Check your email and click the confirmation link to fully activate your account
Important: Make sure to confirm your email address or your account will not be fully activated and you will not be able to access the API!
-
Generate Your API Token
- Log into your Cloud Slicer account
- Navigate to the dashboard - you'll be redirected here automatically after login
- Click on the
Tokenstab in the left sidebar - Create a new token by clicking the
New Tokenbutton - Configure your token:
- Give it a descriptive name (e.g., "My First Token")
- Set the expiration in days OR leave blank for no expiration
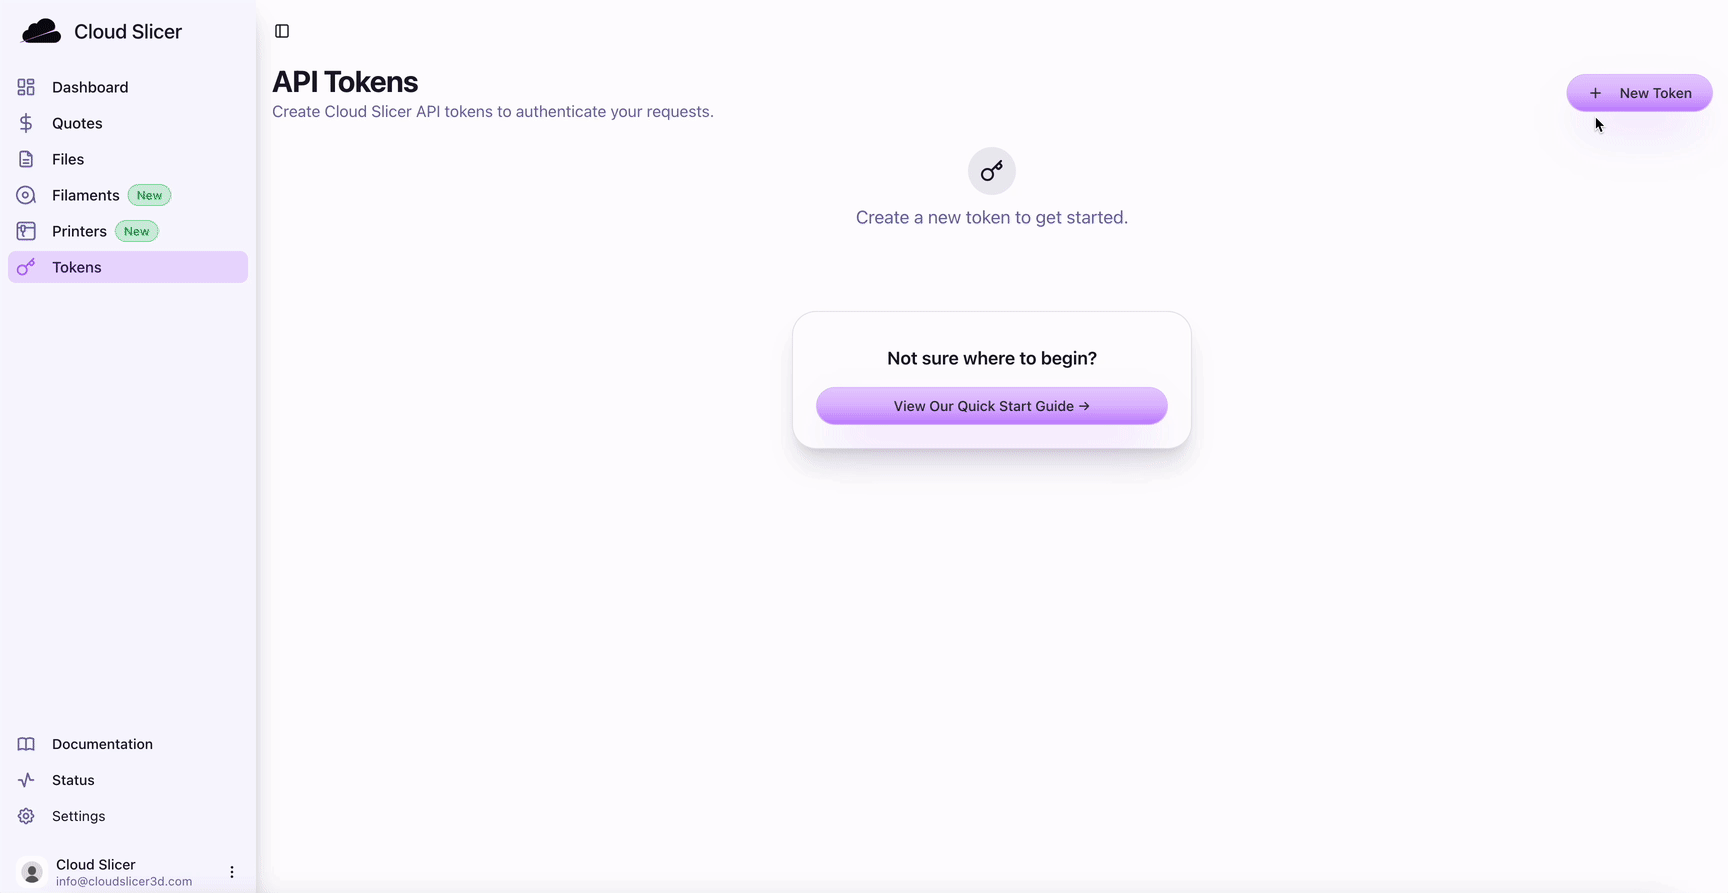
- Copy the generated token immediately and store it securely
Important: You will only see the token once! Make sure to copy and save it in a secure location before closing the popup.
-
Create a Printer Config
- Click on the
Printerstab in the left sidebar - Click the
+icon in the top right corner - Configure your printer settings to match what you currently have in your local slicer application
- Save the printer configuration
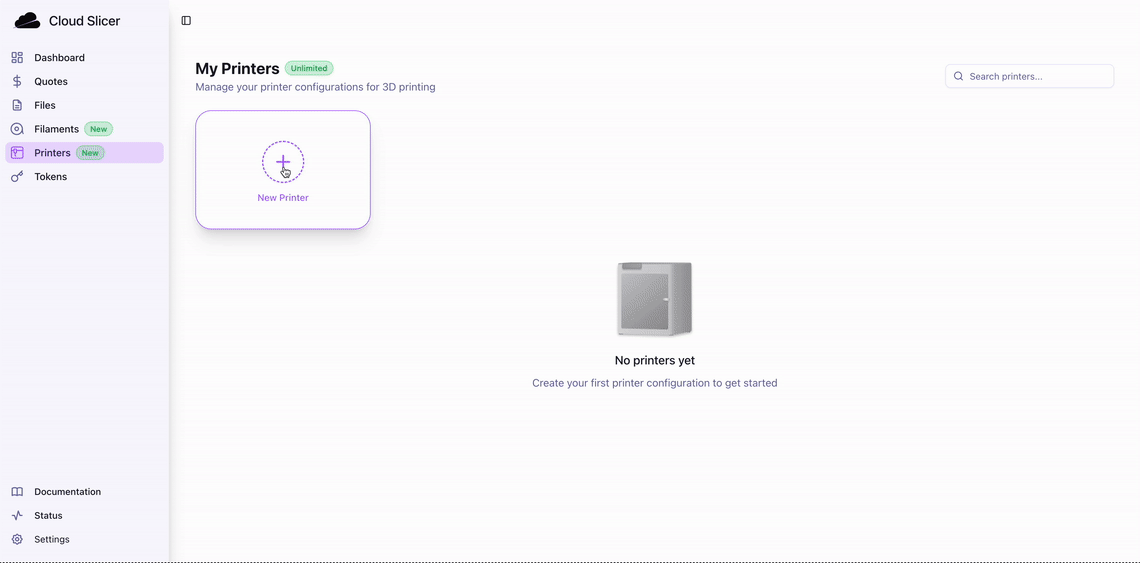
Note: Keep track of your
printer_idas you will use this in your API calls. - Click on the
-
Create a Filament Config
- Click on the
Filamentstab in the left sidebar - Click the
+icon in the top right corner - Configure your filament profile to match what you will use for printing
- Save the filament configuration
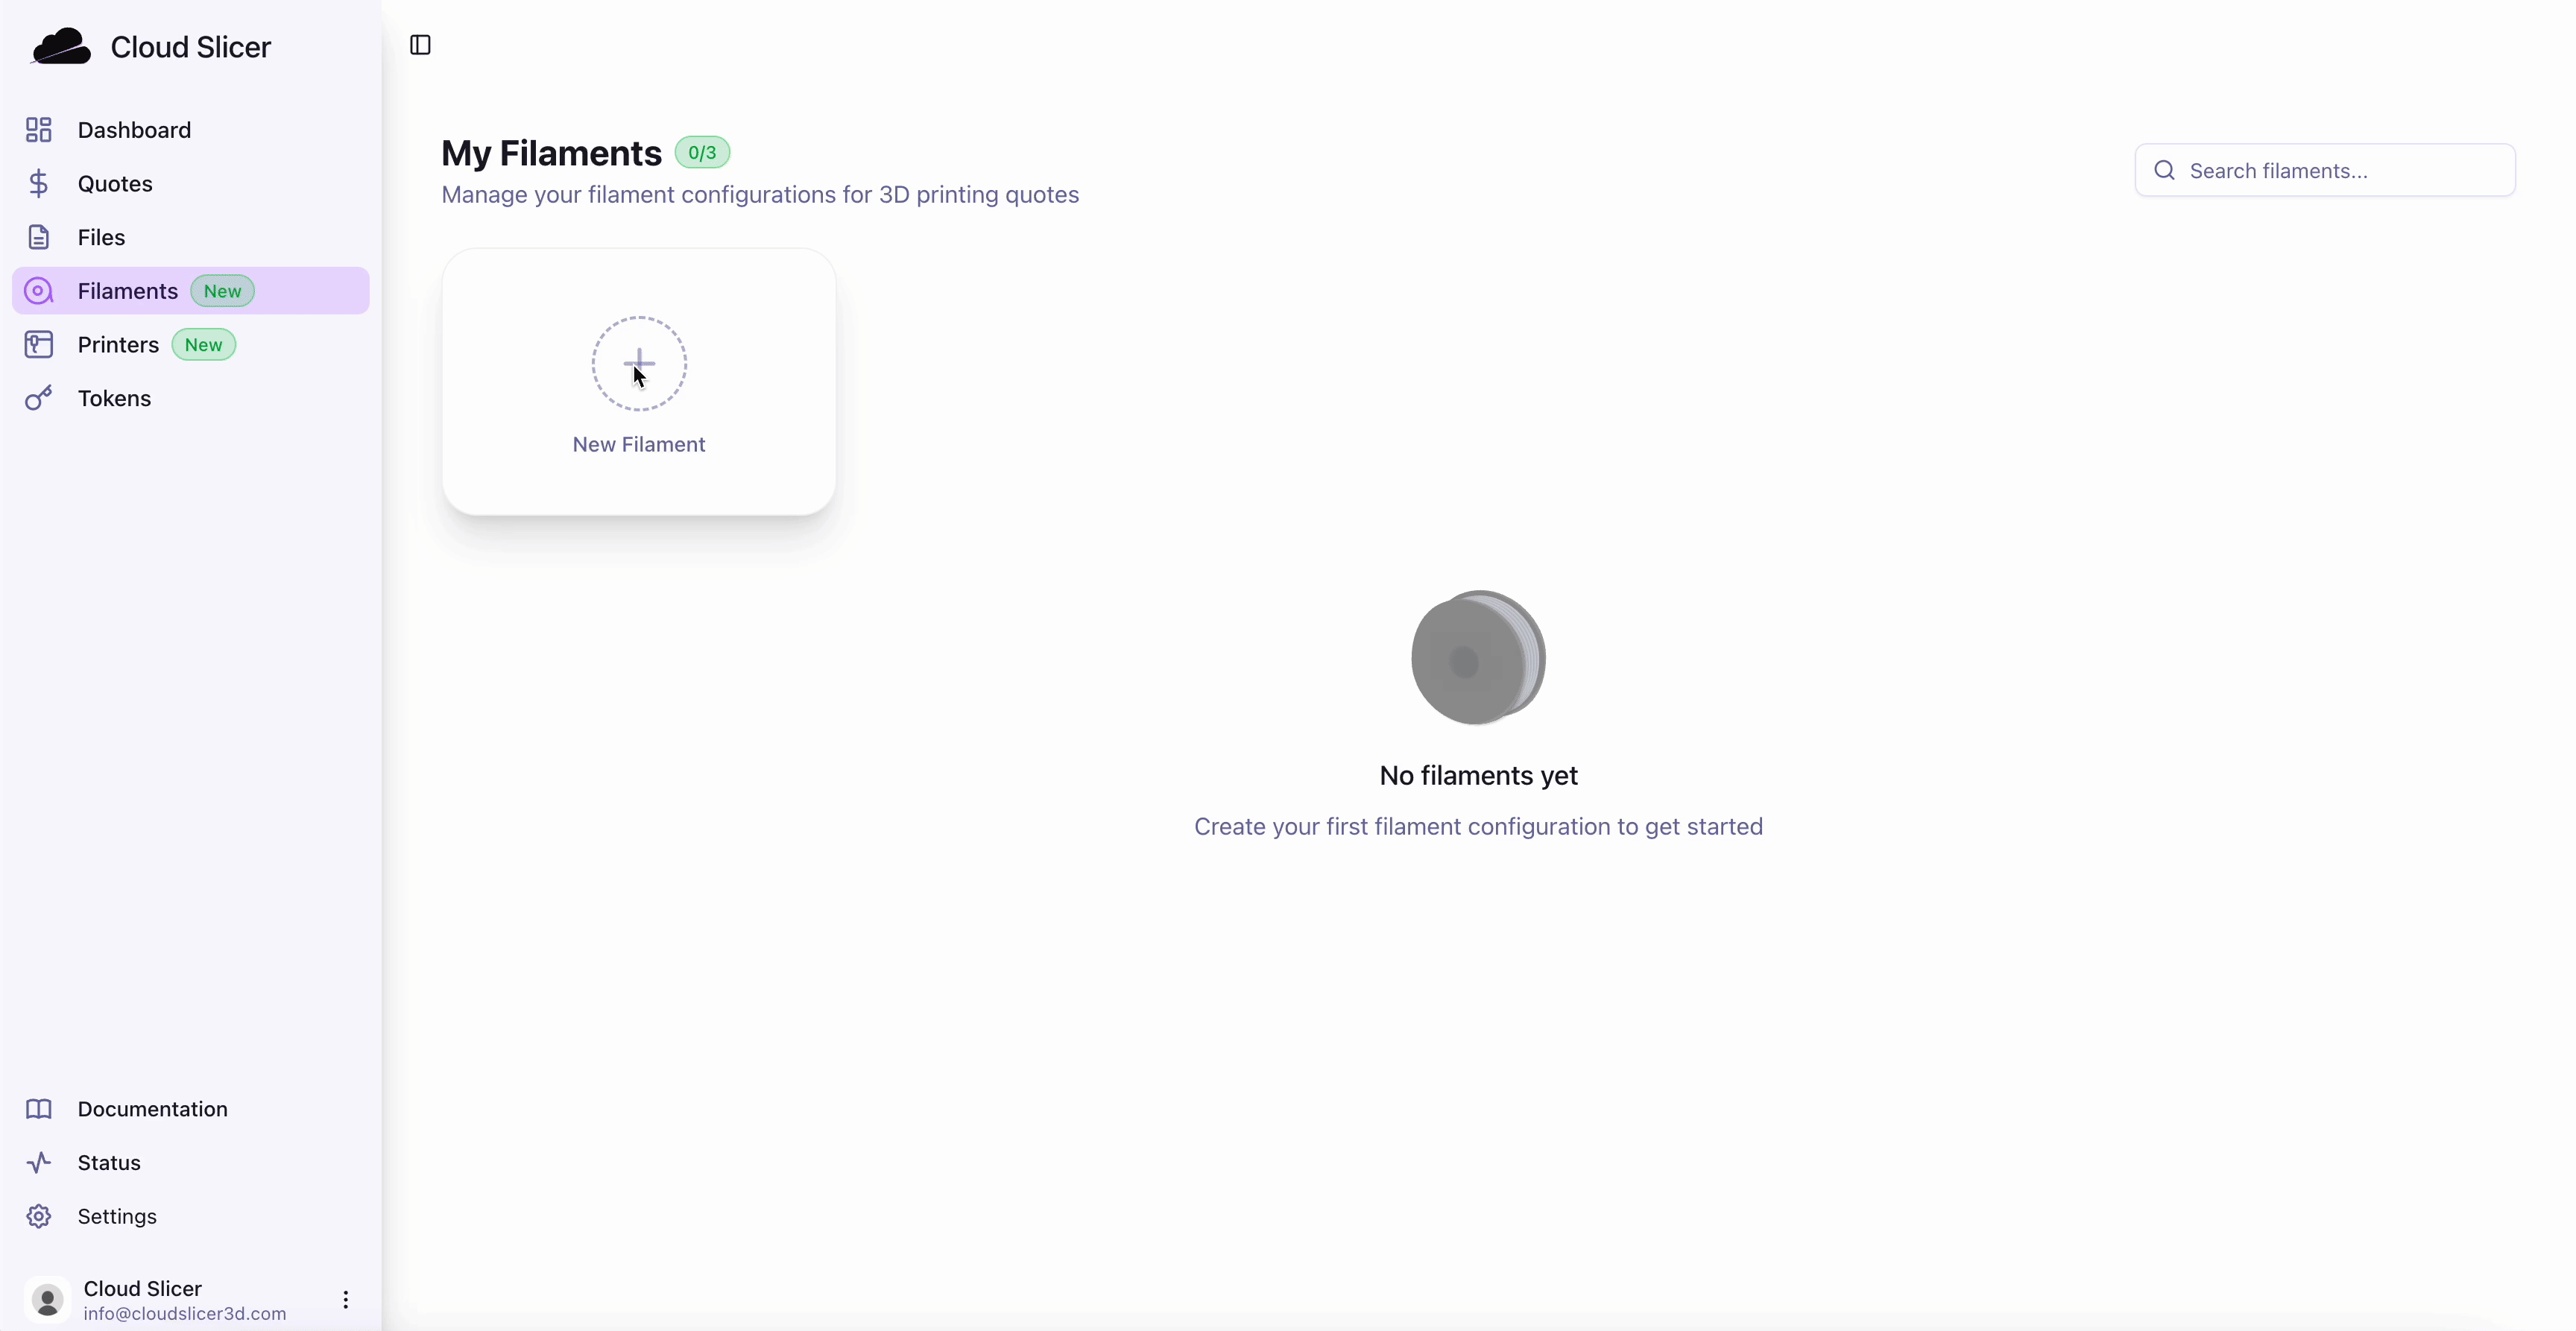
Note: Hold on to your
filament_idas you will use this in your API calls. - Click on the
-
Authenticate with the API
- Navigate to the API playground at docs.cloudslicer3d.com/api
- Click the
lock iconin the top right corner - Paste your JWT token from Step 2 into the authorization field
- Click
Authorize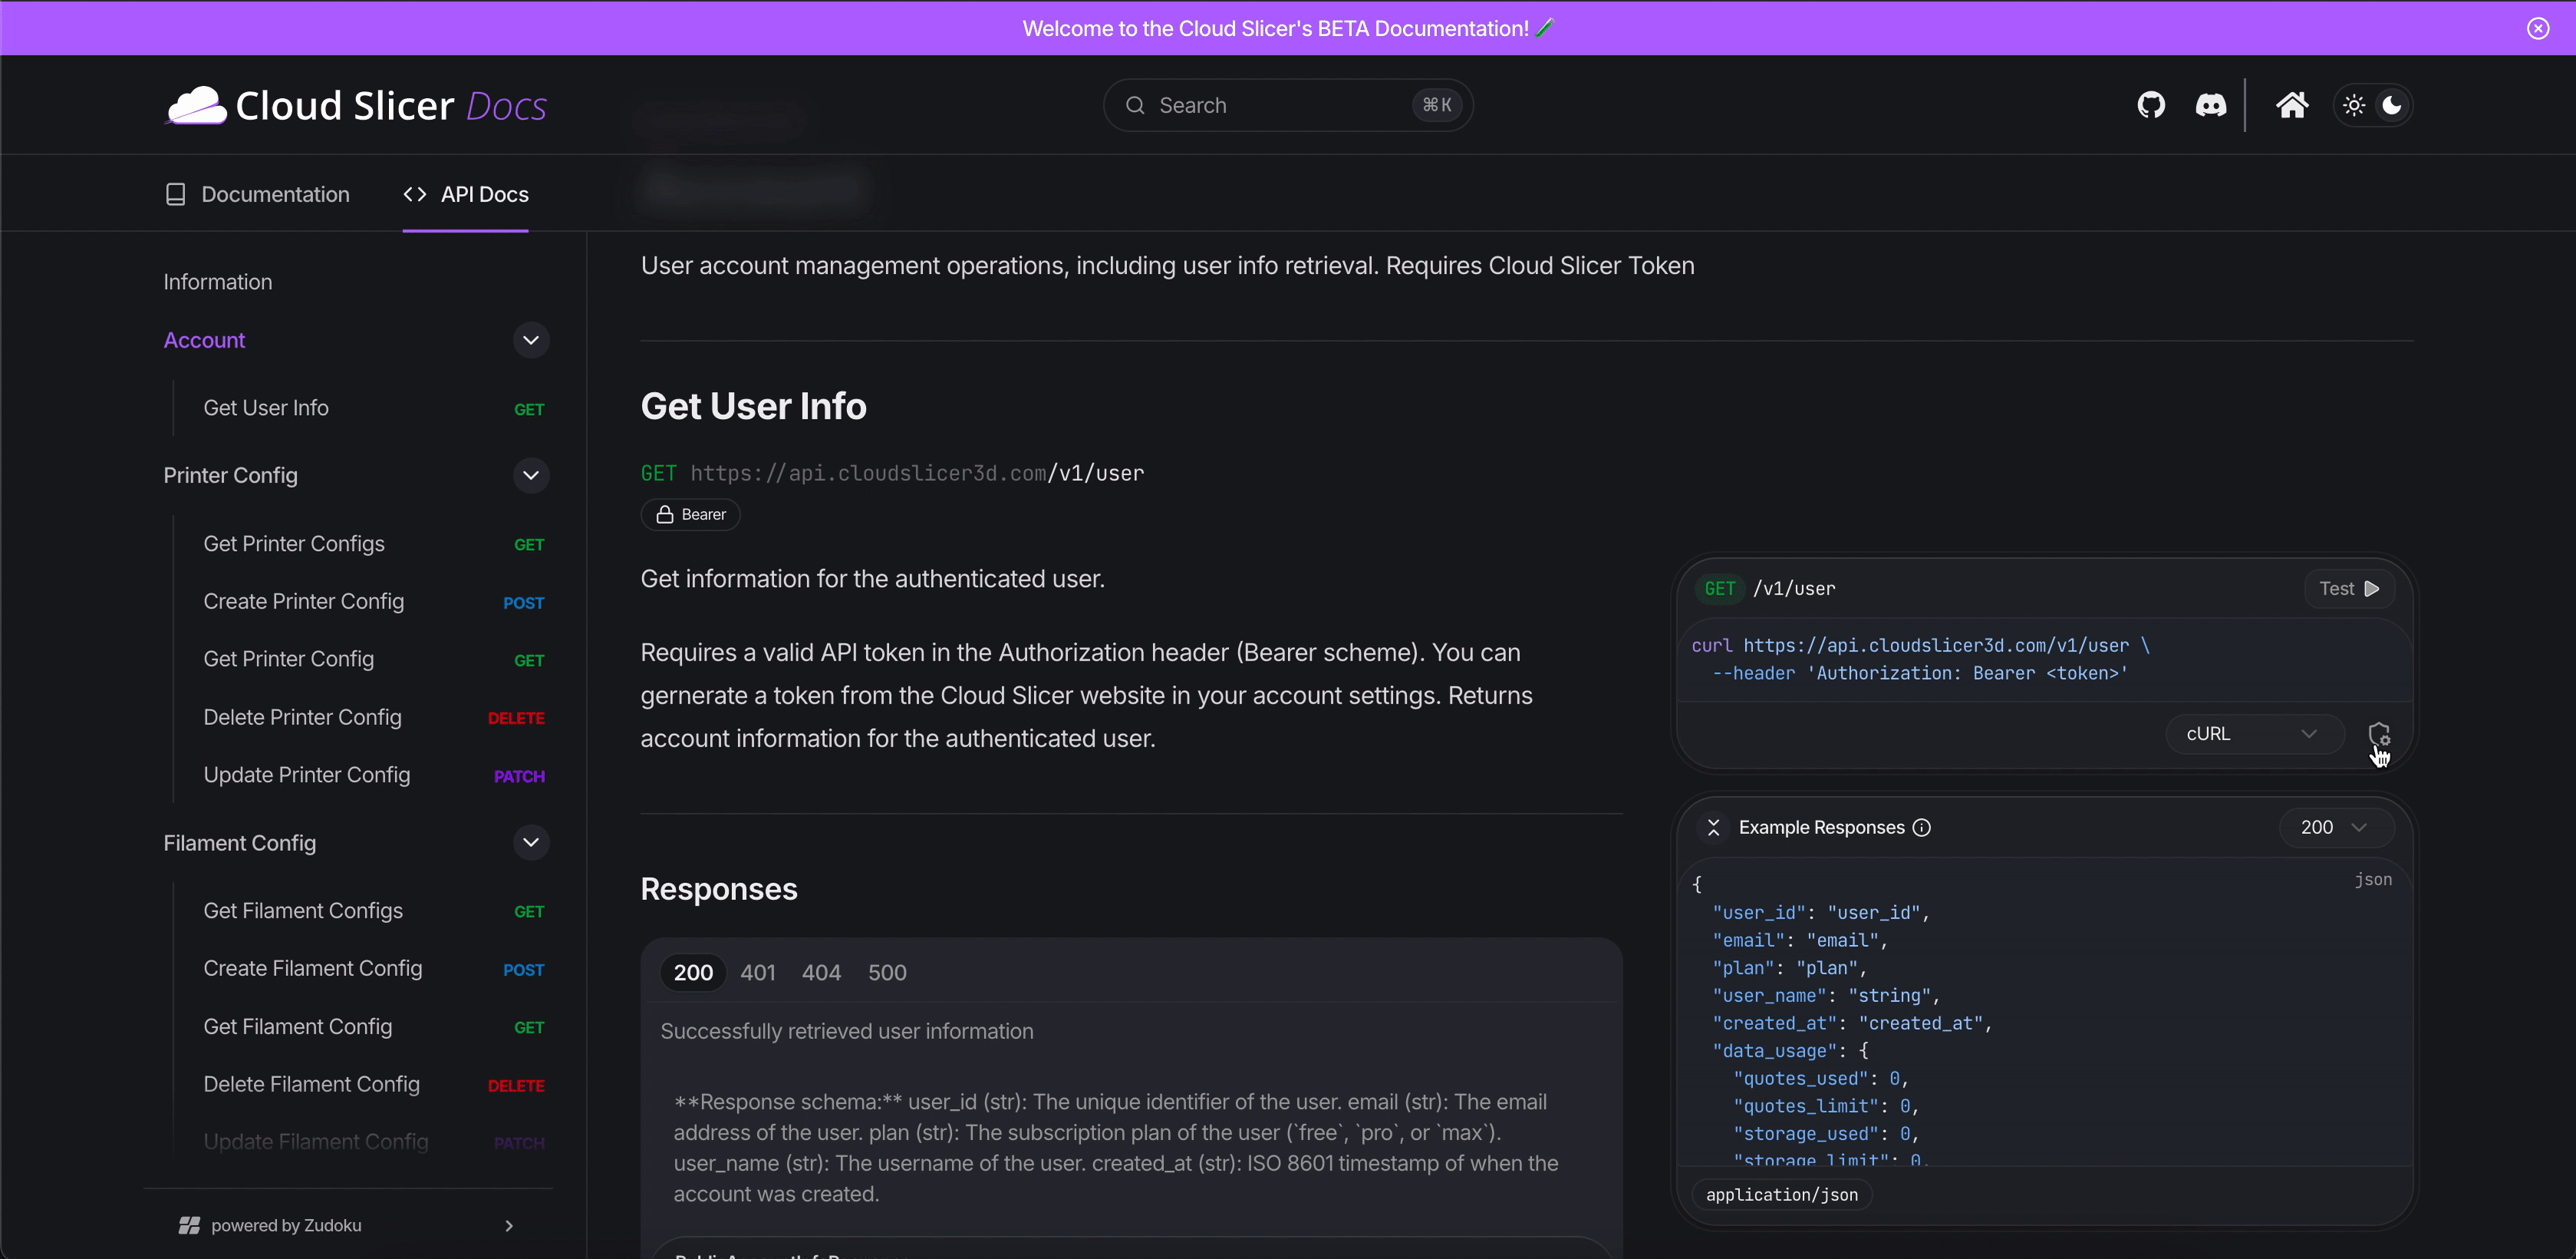
You're now authenticated and ready to explore the Cloud Slicer API.
-
Make Your First Set of API Calls
Upload your first STL file:
- Find the
POST /v1/fileendpoint in the API documentation - Expand the tab to reveal the POST request details
- Upload an STL file using the
choose filebutton to open up your file explorer - Execute the request
- Copy the
file_idfrom the response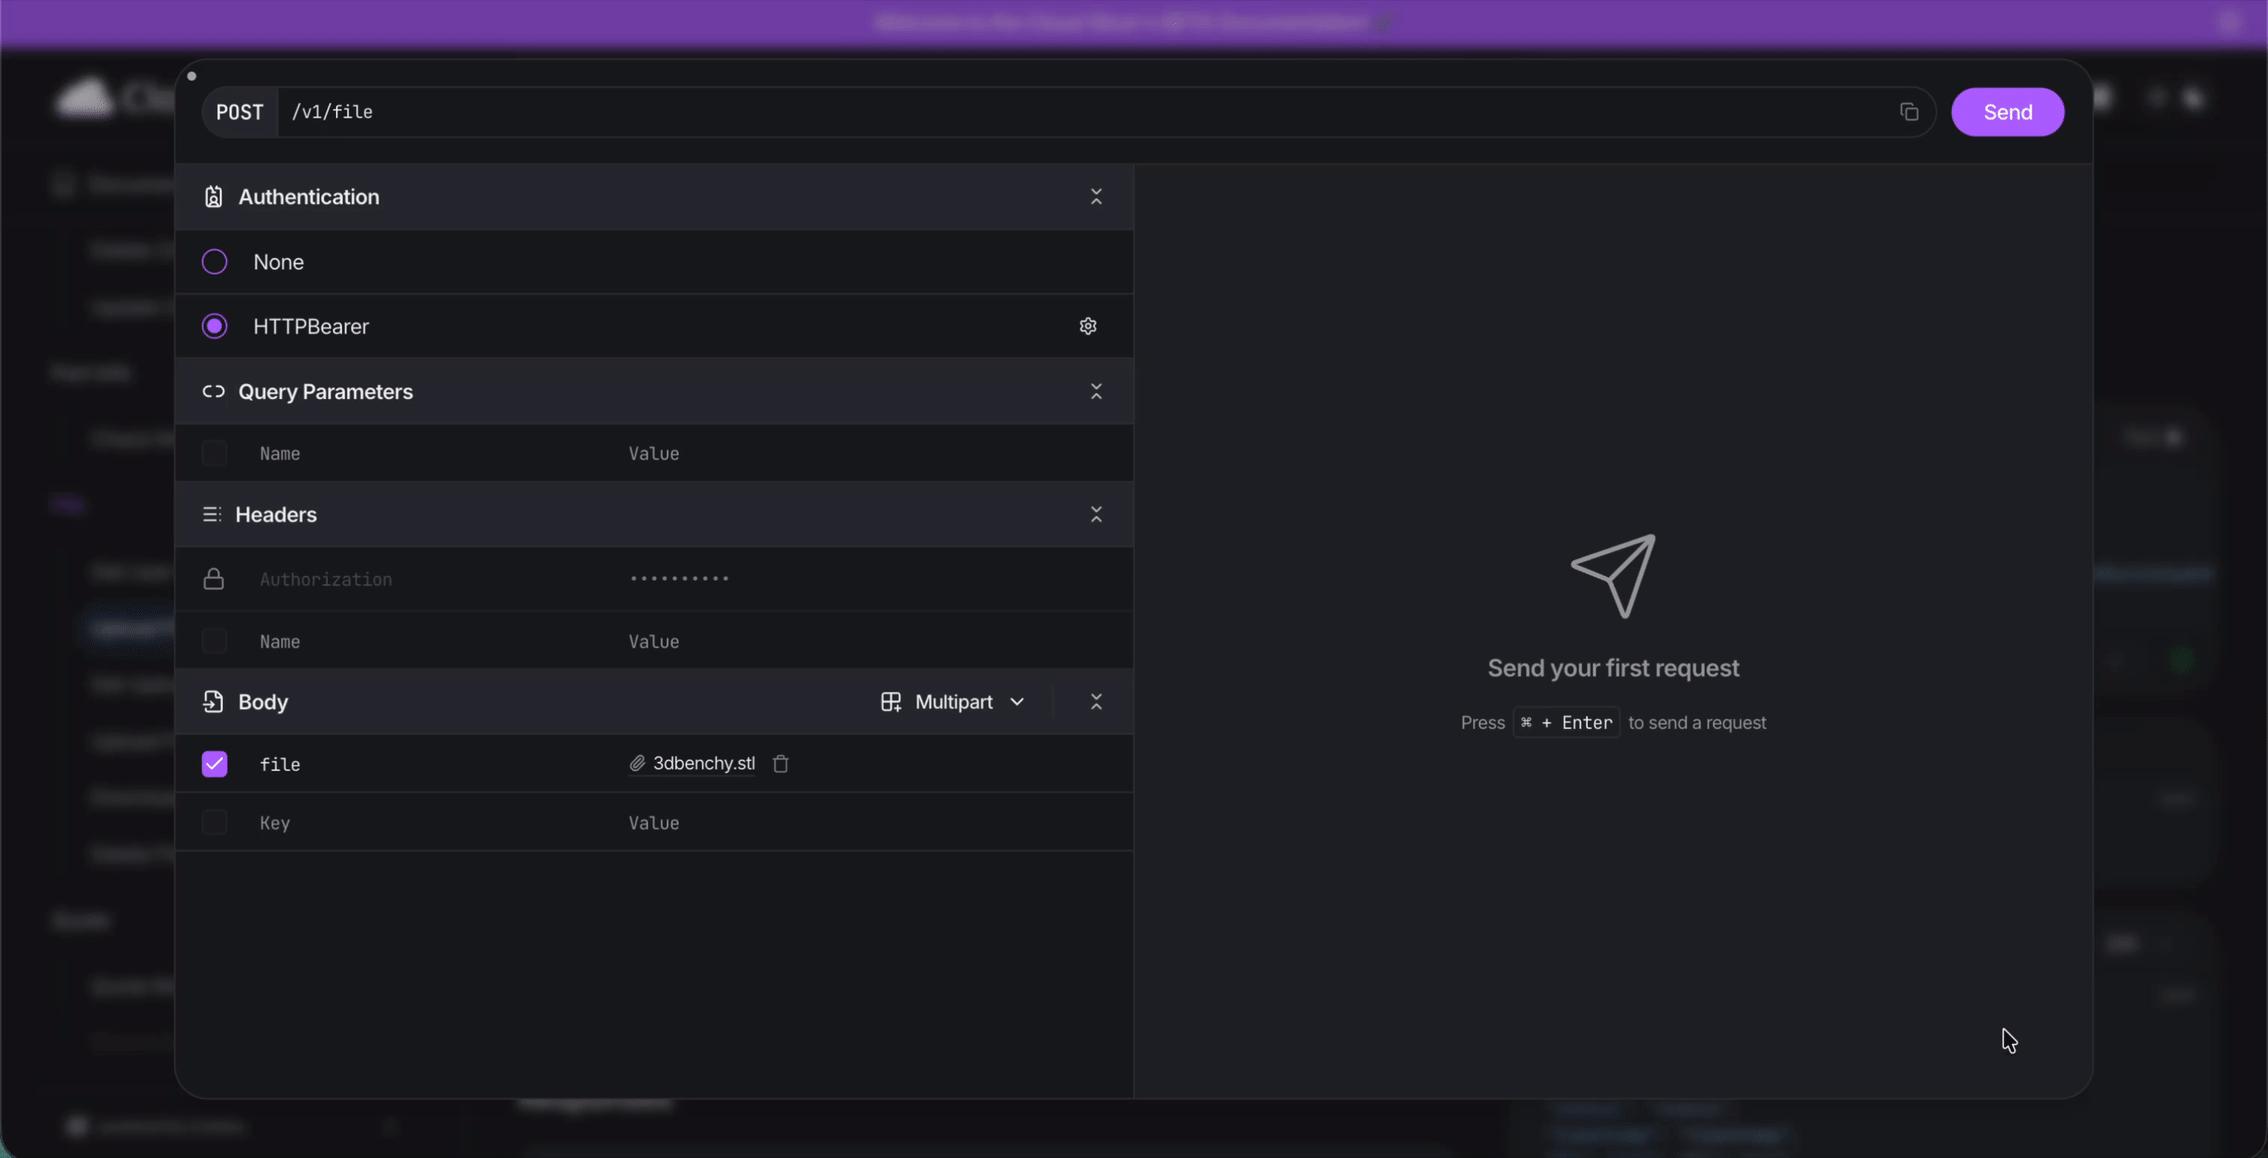
Queue your first quote:
Slicing can take anywhere from a few seconds to over a minute, so quotes are async. You queue a job, then poll until it's ready.
- Find the
POST /v1/quote/queue/{file_id}endpoint in the API documentation - Expand the tab to reveal the POST request details
- Add Details:
- Fill in the path parameter with the
file_idfrom the previous upload step - Fill in both the
printer_idandfilament_idfields in the request body with the IDs created in Steps 3 and 4 - Optionally tweak the
pricing_configandprint_settings— both fall back to sensible defaults if omitted
- Fill in the path parameter with the
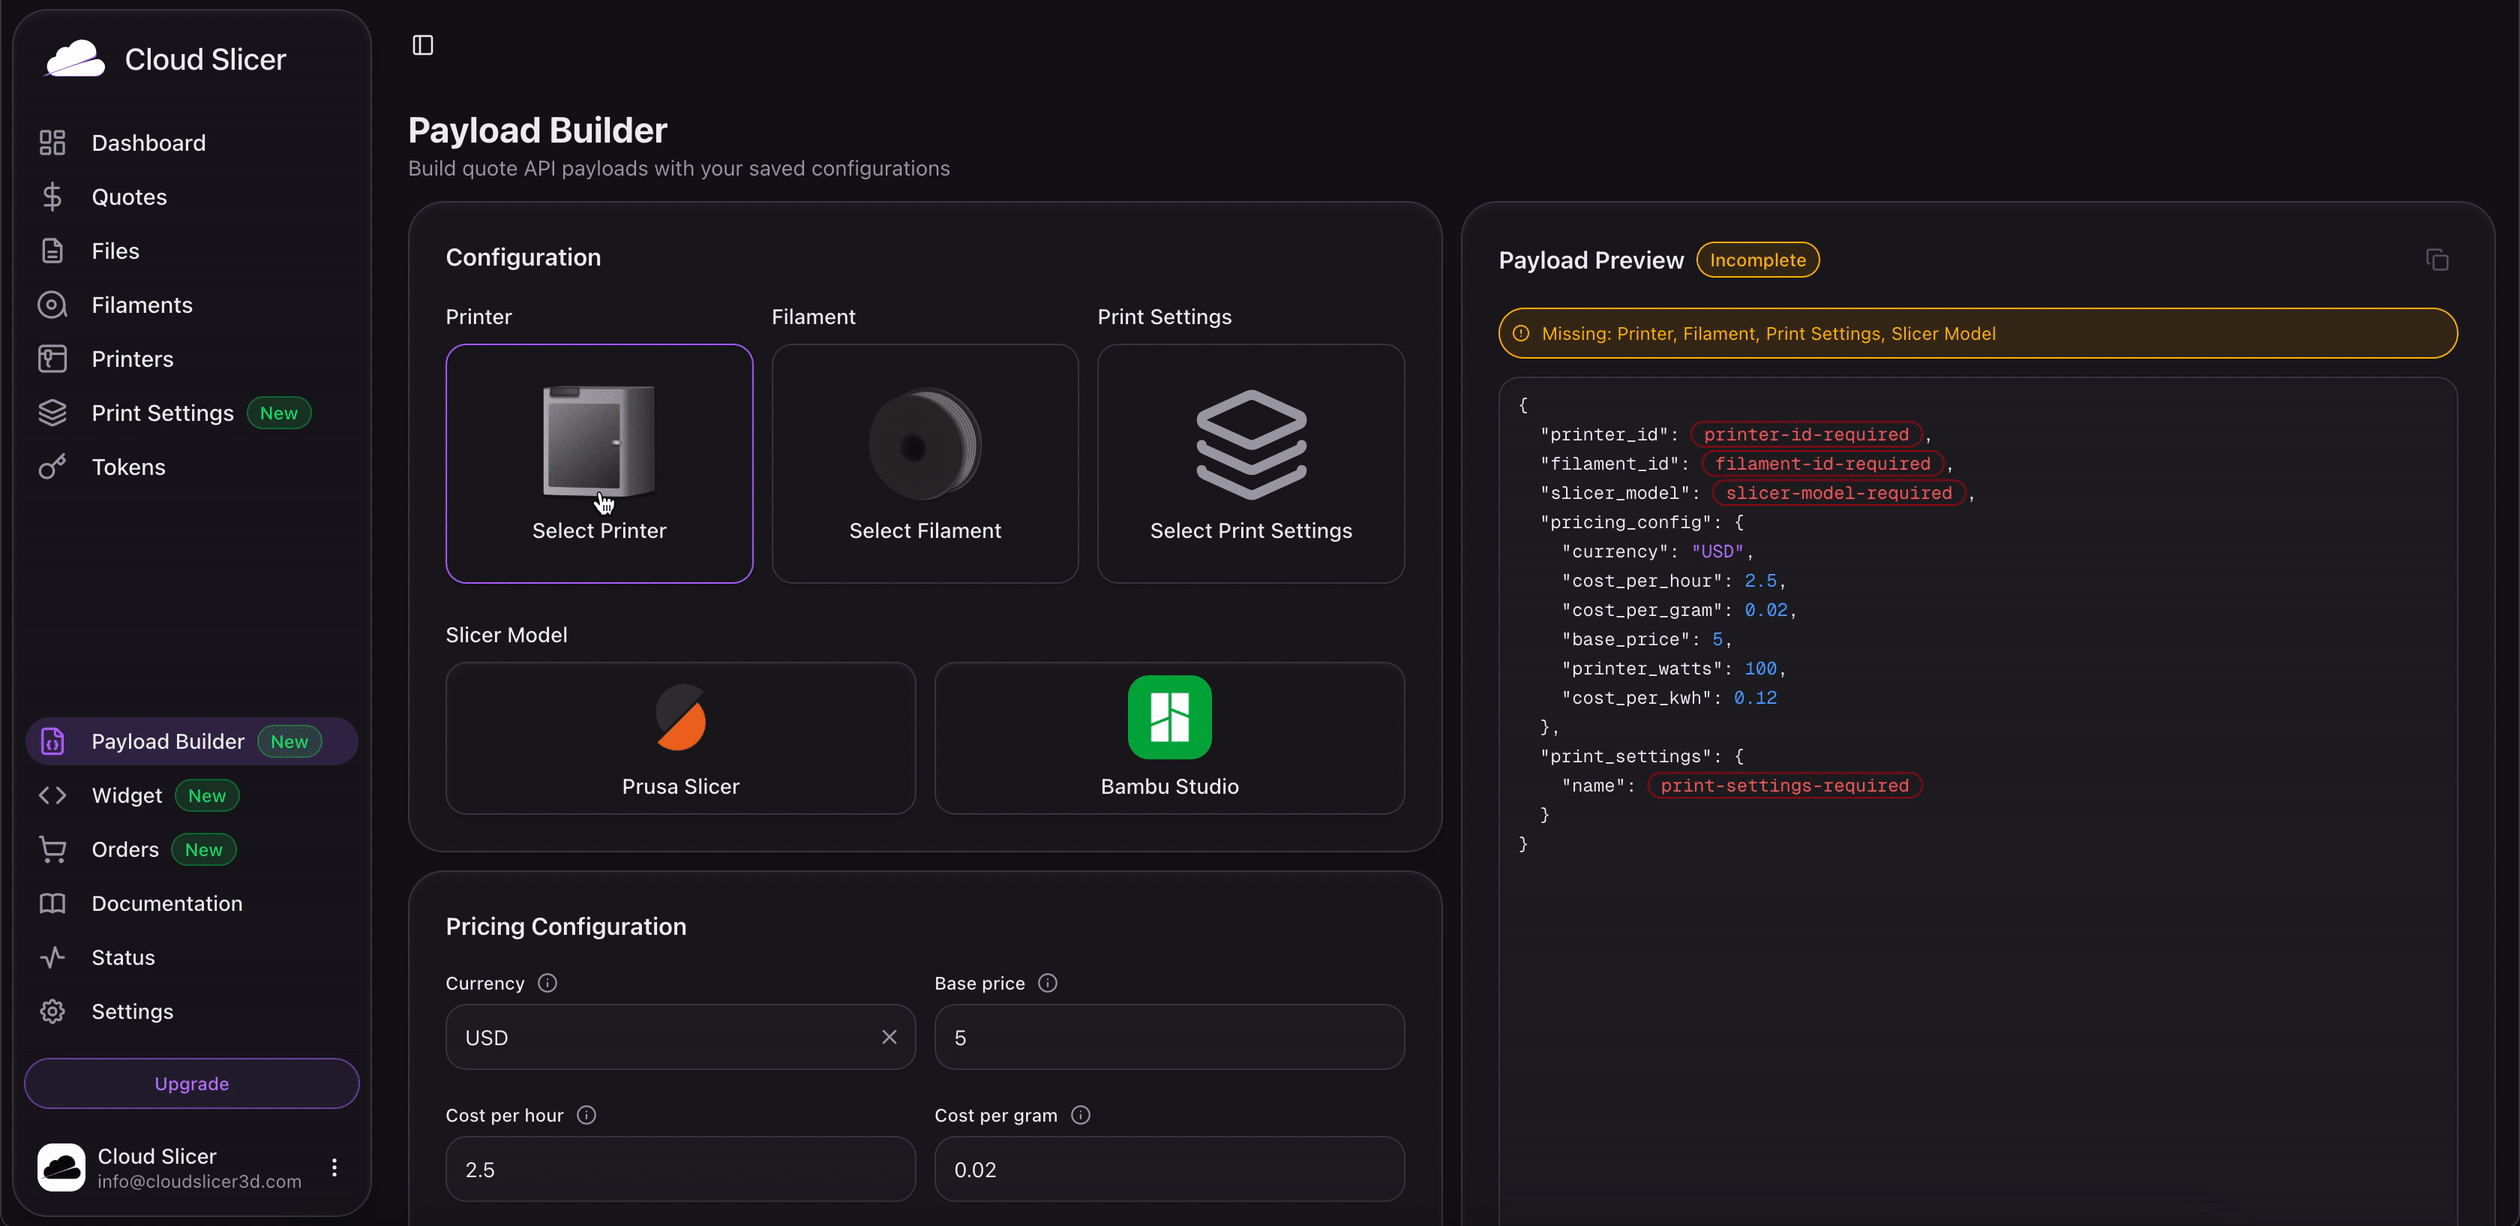
You can use the payload builder to help you in constructing your request payload as shown above. 👆
- Execute the request — you'll get back a
202 Acceptedwith aquote_id - Copy the
quote_idfrom the response
Poll until it's ready:
- Find the
GET /v1/quote/{quote_id}endpoint - Paste the
quote_idinto the path parameter and Execute - Re-run every couple of seconds —
statusstarts at"pending"and ends at"success"or"failed" - Once
statusis"success", the response includespricing,time, andfiles.gcode_path— download the g-code withGET /v1/quote/gcode/{quote_id}
For a step-by-step code walkthrough of this same flow, see Creating Quotes.

You will now see activity in your dashboard since you have uploaded a file and generated a quote
- Find the
Reminder: All API endpoints require authentication with your Bearer token. Make sure to include it in your requests!
Need help? Check out our API Playground for detailed documentation on all available endpoints.